
Finally I got to watch “Tim’s Vermeer” – I don’t know why it took so long, as I promised myself to get it when it was released. This excellent documentary extrapolates on David Hockneys Magnum Opus “Secret Knowledge” where convincing circumstantial evidence are put forward that some artists used Optical aids earlier than usually acknowledged by traditional art historians. Mind that I say some artists, the Hockneyan term “eyeballing” draughtmanship as opposed to the “Optical” vision and tracing a projection has dominated western art since the Ancient Greeks and there are artists through the ages with considerable skills bordering to obsession in creating lifelikeness by acquiring knowledge in anatomy, perspective and projection.
That said, there are certain other works of art that gets you wondering like those of Holbein, Caravaggio and Vermeer among others.
There are some weak points in the Hockneyan theories, for me the chief one is his proposal that the paintings were not only drawn in a darkened room from a Camera Obscura but also painted during such low light circumstances. Being from a country that resides in almost complete darkness during the colder parts of the year that part of the theory would not hold up – chasing natural light for prolonged periods of time during wintertime I assure you, would drive any aspiring swedish Vermeer nuts.
“Tim’s Vermeer” has eliminated that obstacle in “Secret Knowledge” by the use of what I would call a ingeniously reinvented, “slightly” modified 2.0 version of the well known Optical drawing aid called Camera Lucida.
Tim Jenison, in the movie, vows to paint a Vermeer using technological means available in the 17th century, reinvented and operated by himself as an untrained painter/draughtsman.
Watching “Tims Vermeer” I realize that Tim is not just anyone – he is the inventor/coder of the brilliant software suite named Lightwave 3D that kept me indoors the good part of the beginning of this millennium. I used Lightwave for drawing, projecting and building my large (2 x 2 x 3,5 meter) easel, I used it to model heads that were transferred to large spray aquatint etchings and the strangest part of it all – I used it to model the studio of Johannes Vermeer!
This insight freaked me out – big time! I still get goosebumps thinking about it as I’m writing this now… This was long ago, around 2001/2003 and I’ve only a vague idea what I was after modeling the studio and some of the furniture. I suppose I was transfixed by the quality of Lightwaves renderer and the endless possibilities of a new medium – 3D modeling and soon to come but not right back then – realtime photographic (or even painterly) quality 3D rendering at a affordable cost. Was Lightwave able to render the fine gradations of the sweeping light from the old lead framed stained glass windows on to the whitewashed rear wall?
 transferred from Lightwave to Blender")
This is a screenshot from another excellent 3D suite Blender, the studio model was exported from Lightwave as .OBJ somewhere back then – unfortunately the original .lwo files are somewhere on a drive suspended in deep storage in the basement.
There I was – already back then trying to recreate an old technology with the aid of a new one 😉
And there was Tim Jenison, at that time, inventor of the new technology – dreaming of using the secret, forgotten old methods to show us something new.
If we attribute Van Eyck the invention of Oil painting and Brunelleschi the Perspective (dubious I know – but for the reasonings sake) they were painters and architects who in their time was celebrated for both their arts and science or craft.
Today we make a distinction – an artists achievements can never be celebrated if they are of a technical kind, and we are blind to the dazzling images of science as works of art!
I believe that Jim’s software (both Toaster and Lightwave 3D) has already earned him a place up there along with Jan van E and Filippo B in the history of humanistic arts and sciences!
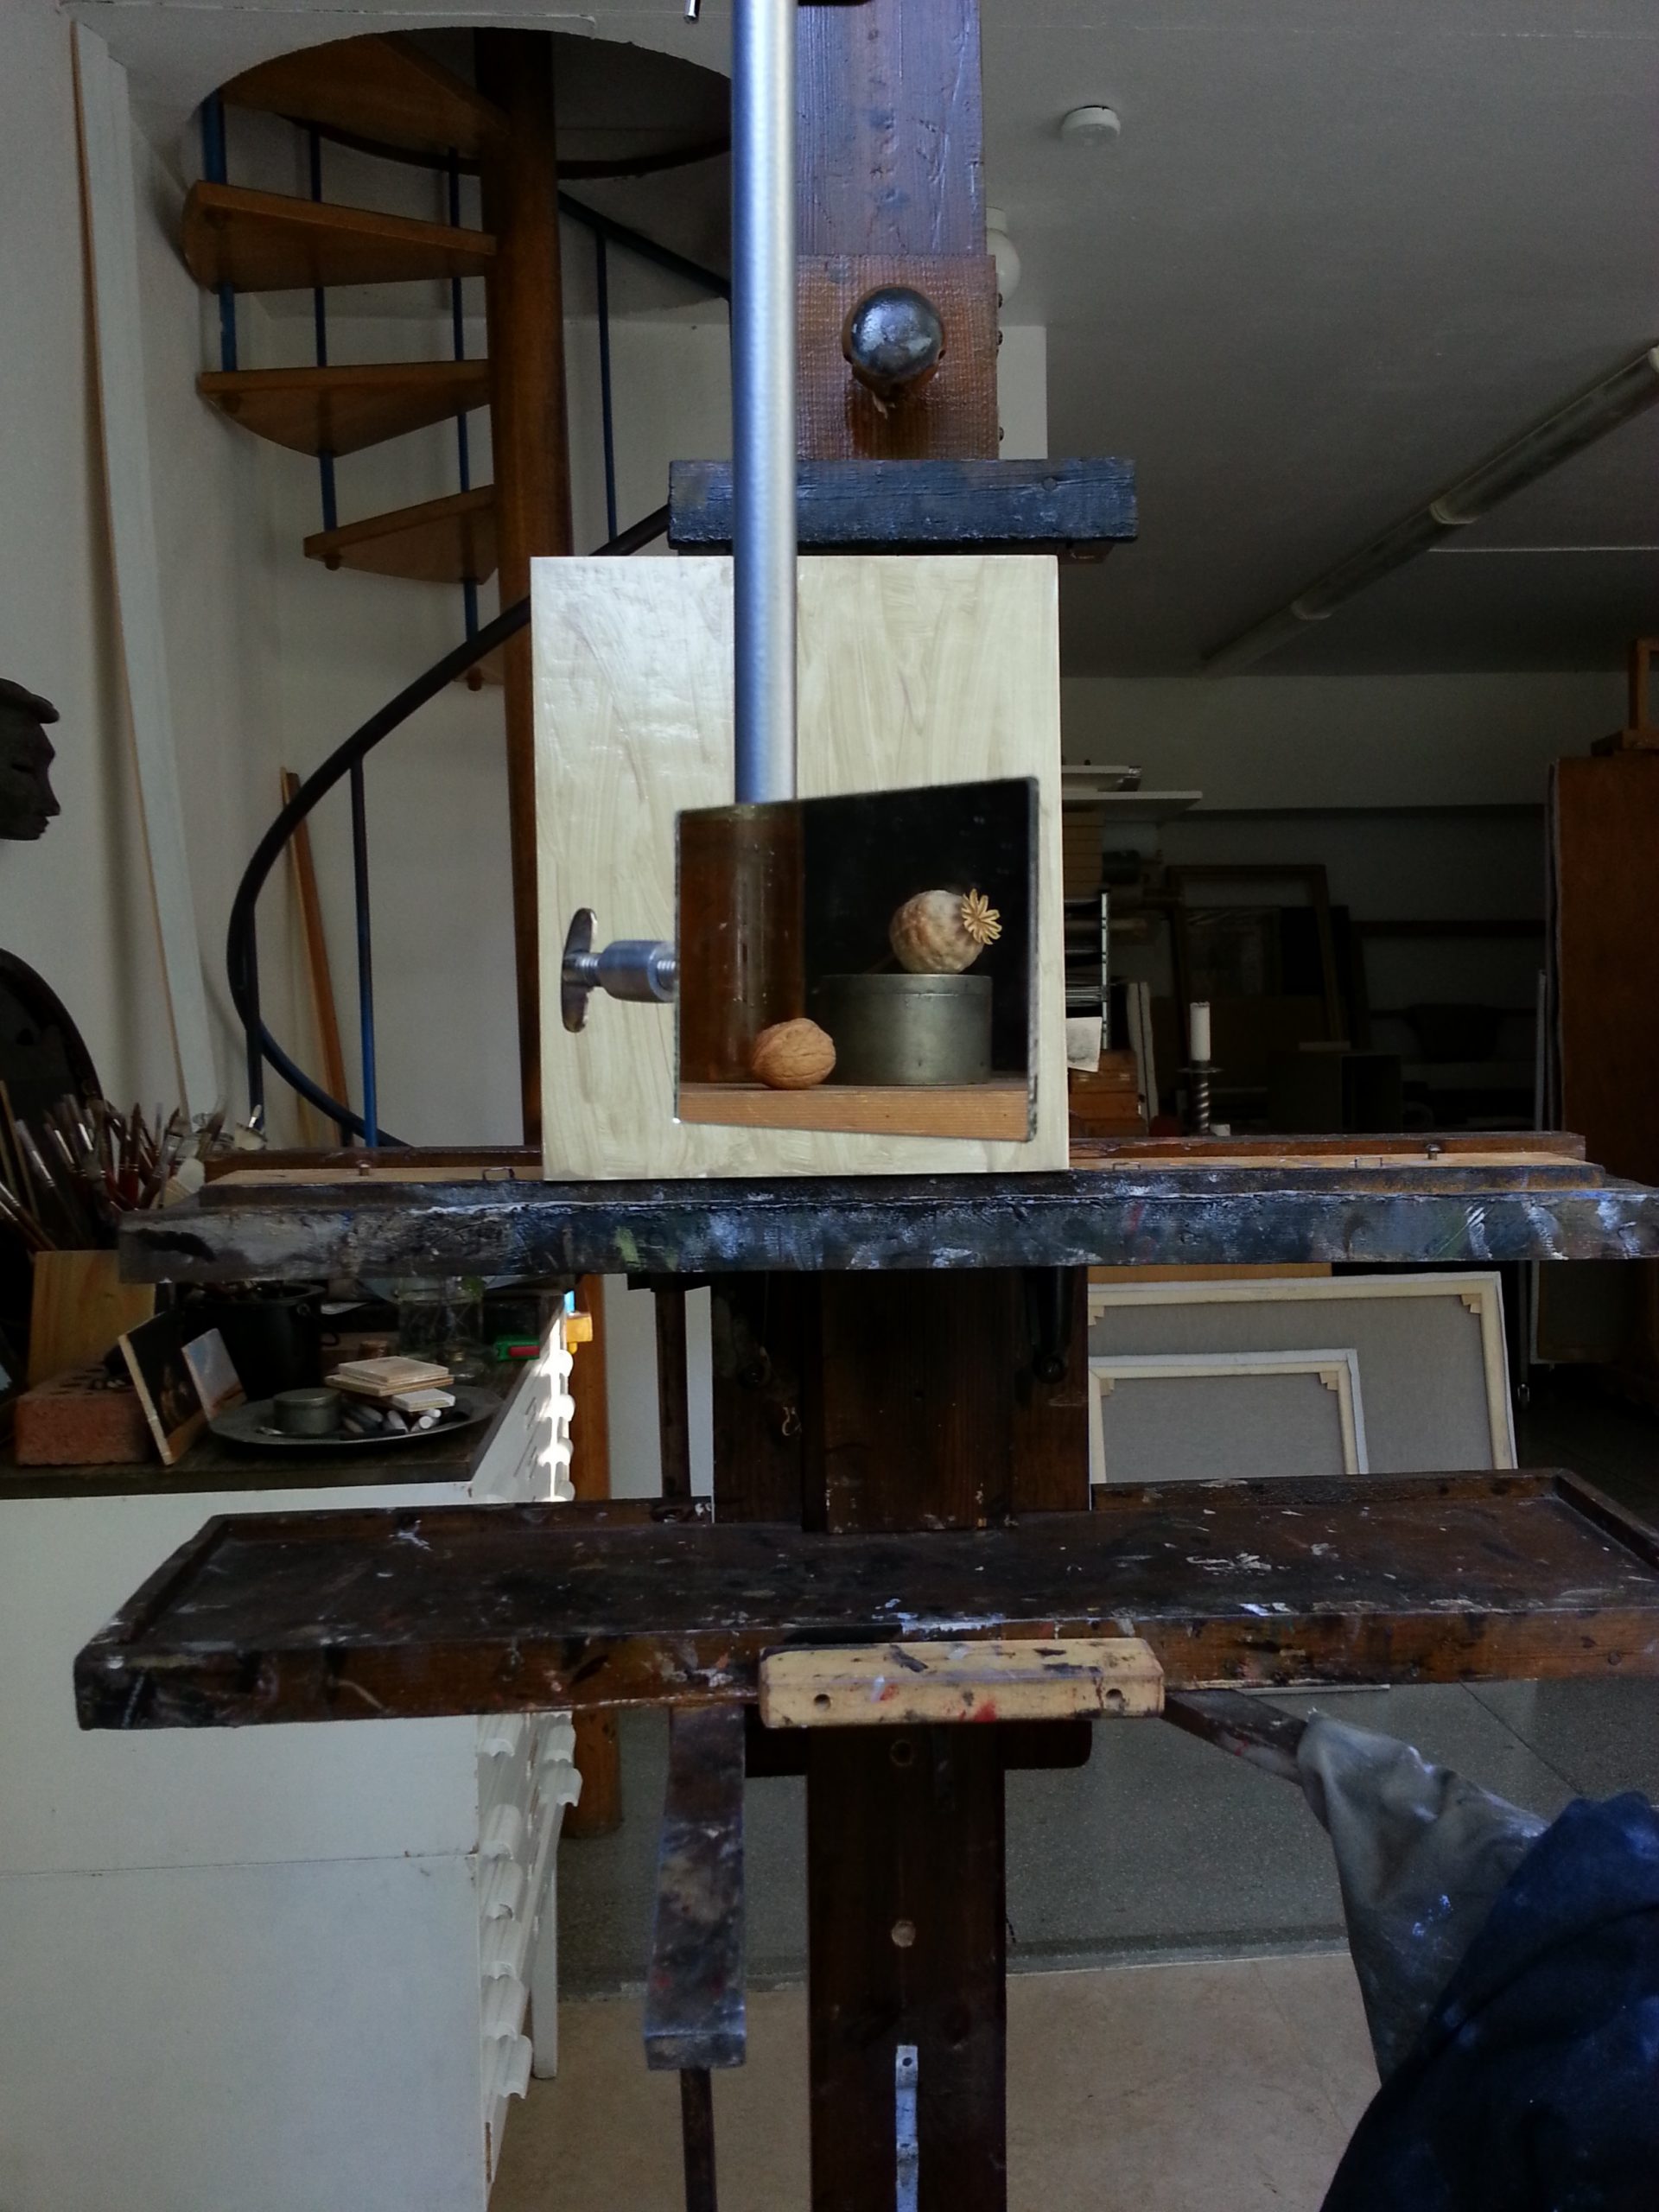
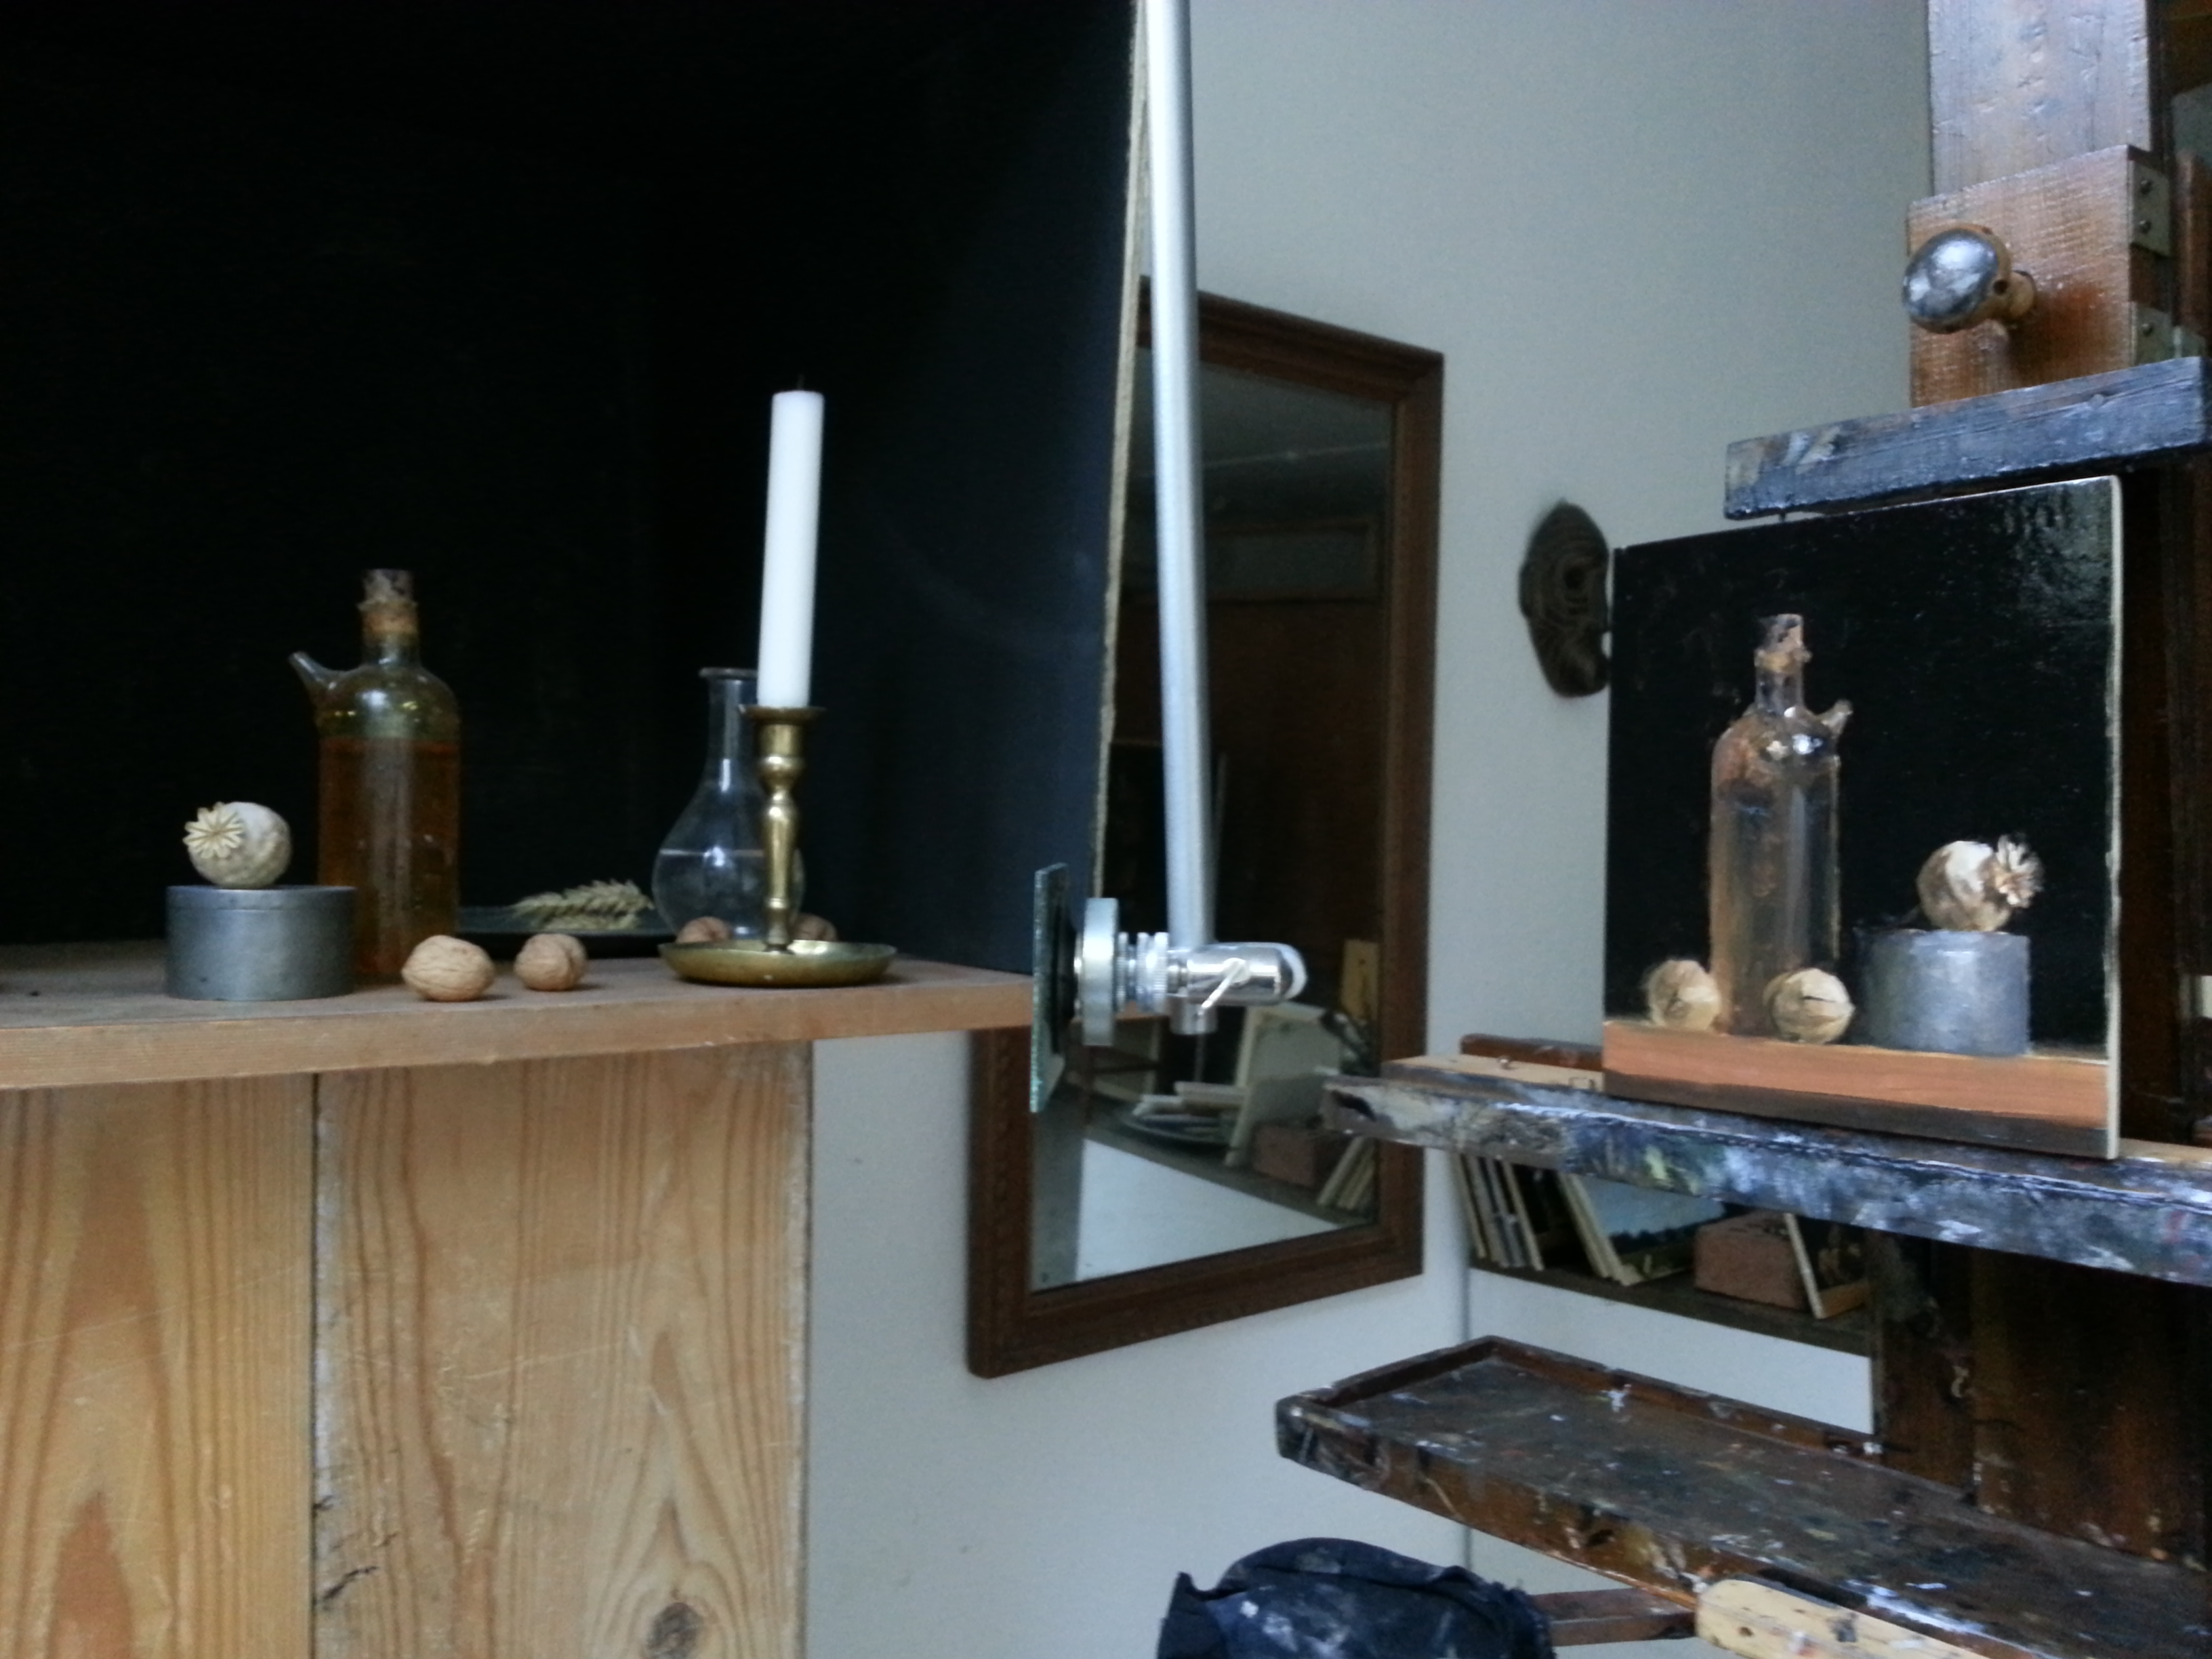
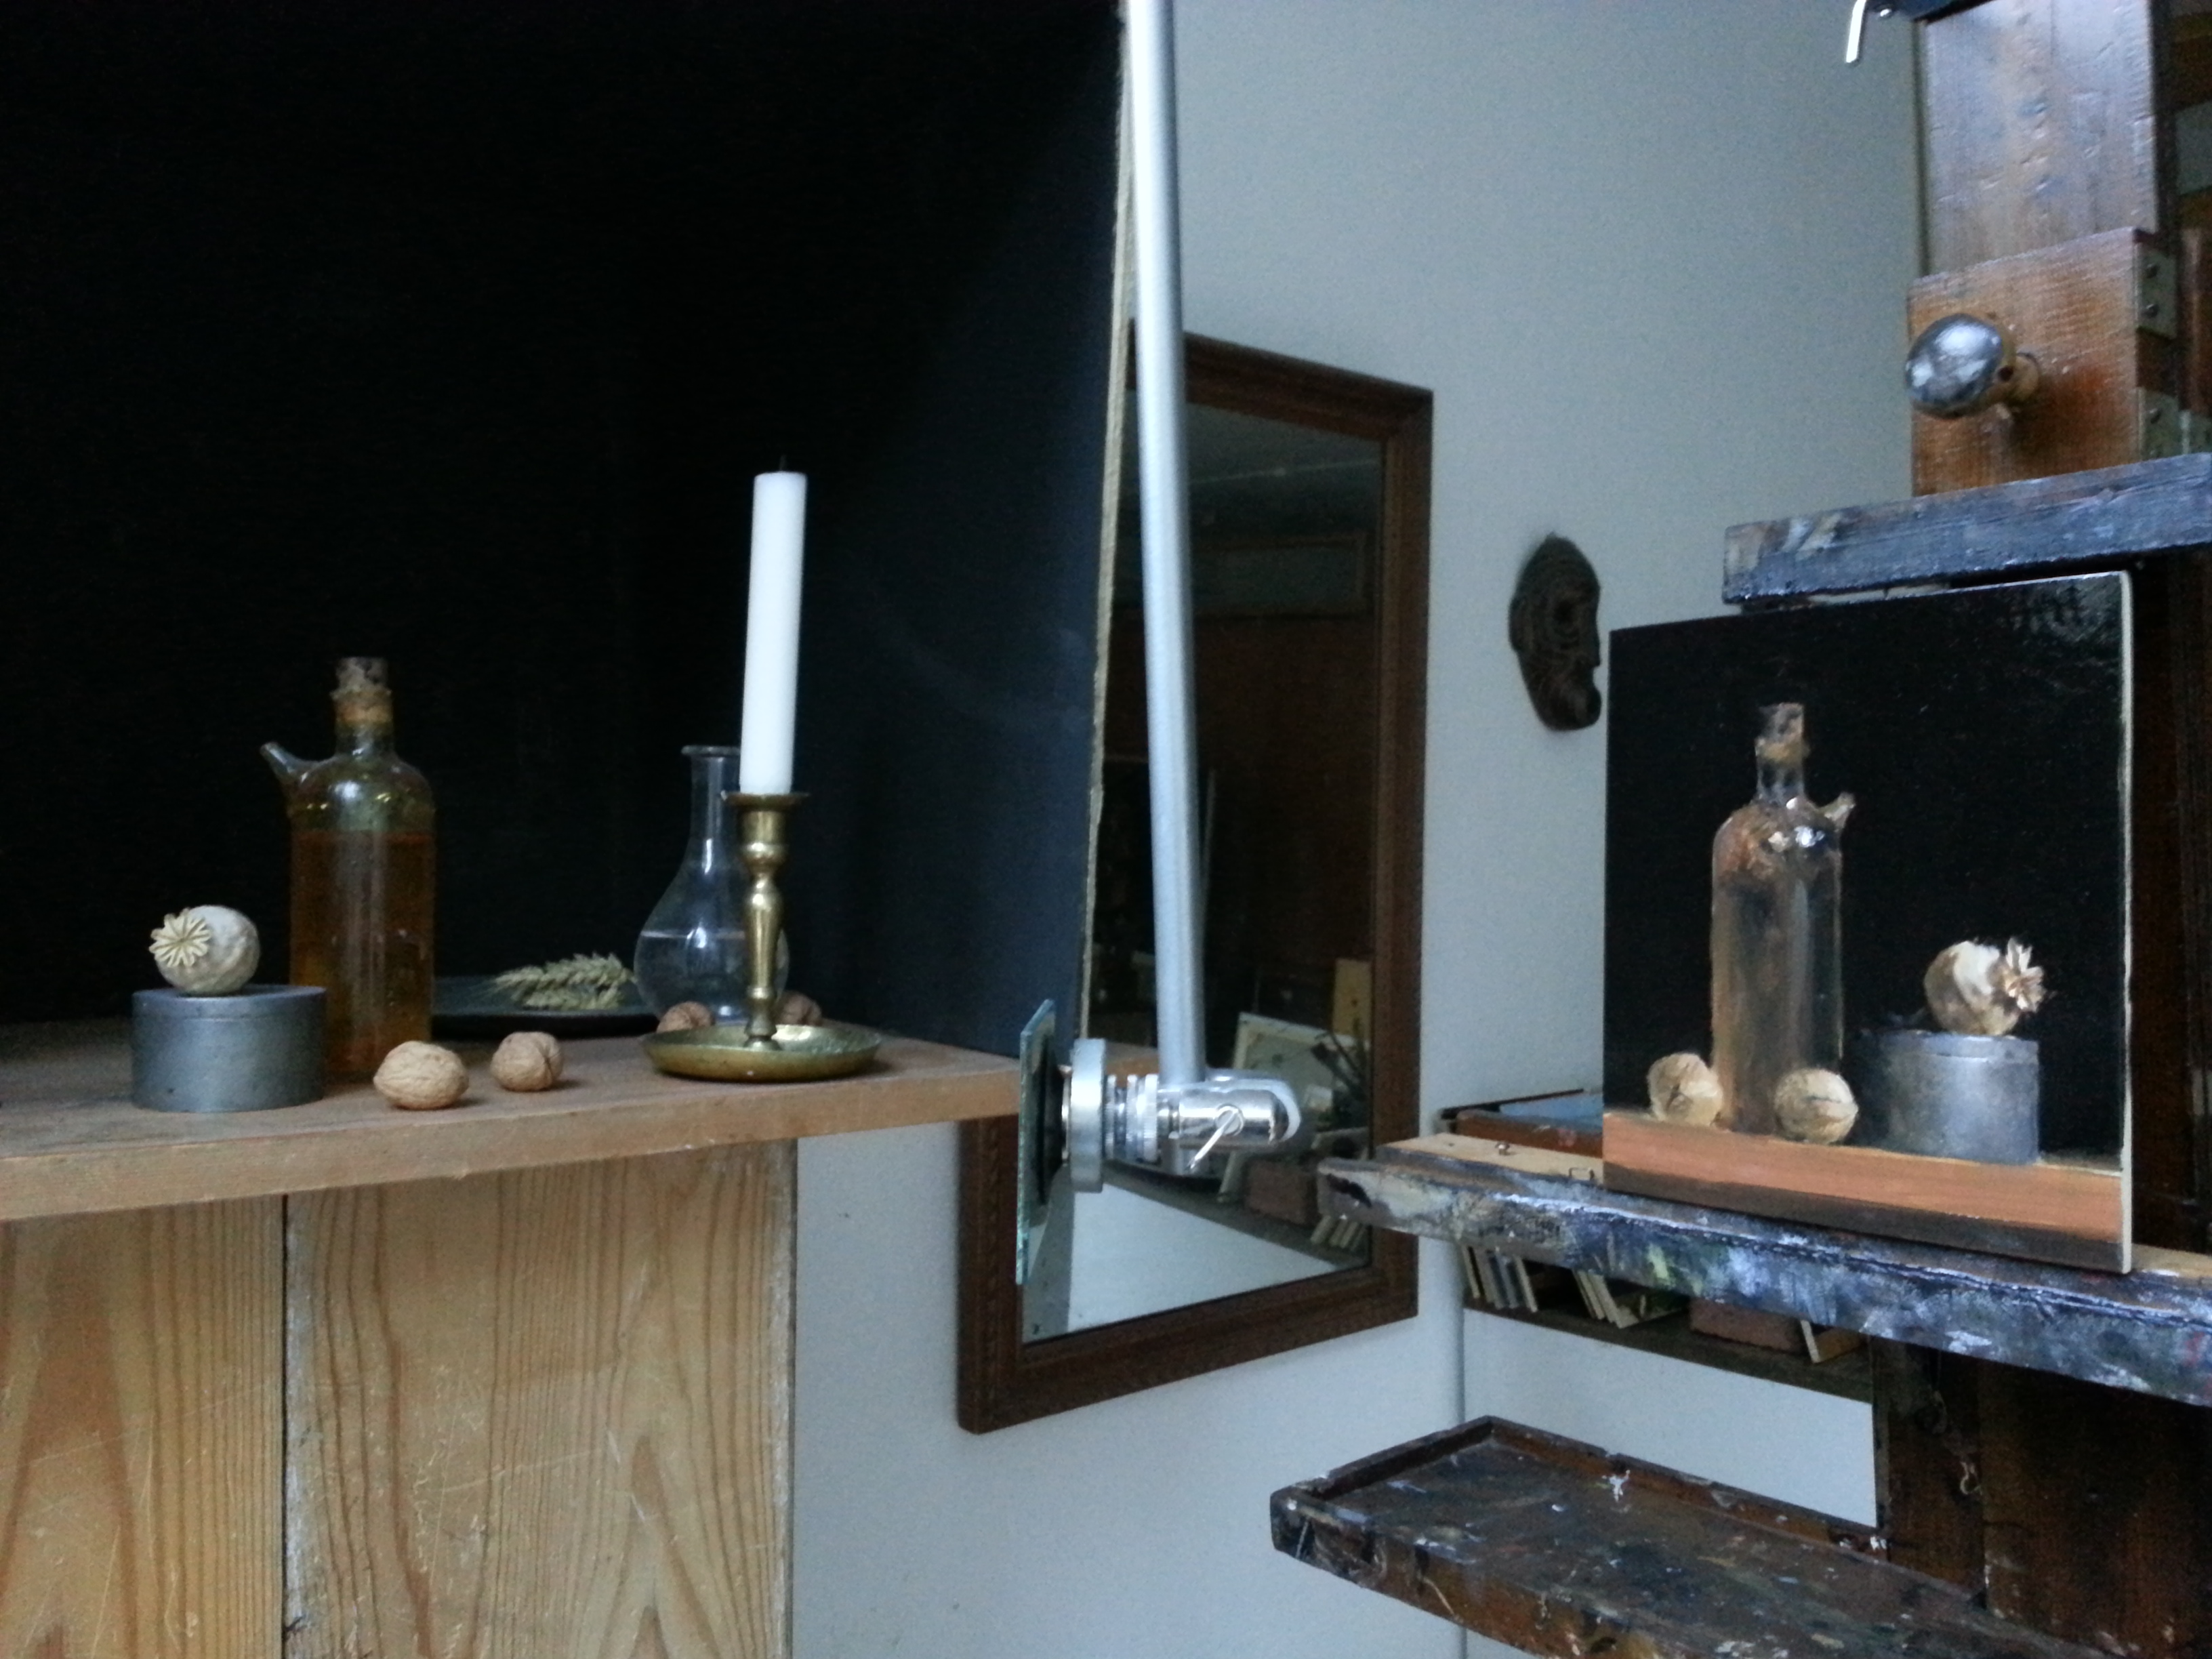
This all and my earlier interest in Hockneys work almost makes me obliged to recreate his experiments in Optically Aided Artistic Vision! Following Tim Jenisons example from his early experiments I placed a mirror mounted on improvised holder, parts of it made of old fly-binding equipment. This setup could be described as a “poor man”s Camera Lucida.
Recreating the later more complex version 2.0 of the Device requires among other things a rather big weak convex lens and a good quality concave “shaving mirror” none of which I have right now. Intend to buy them some day though…

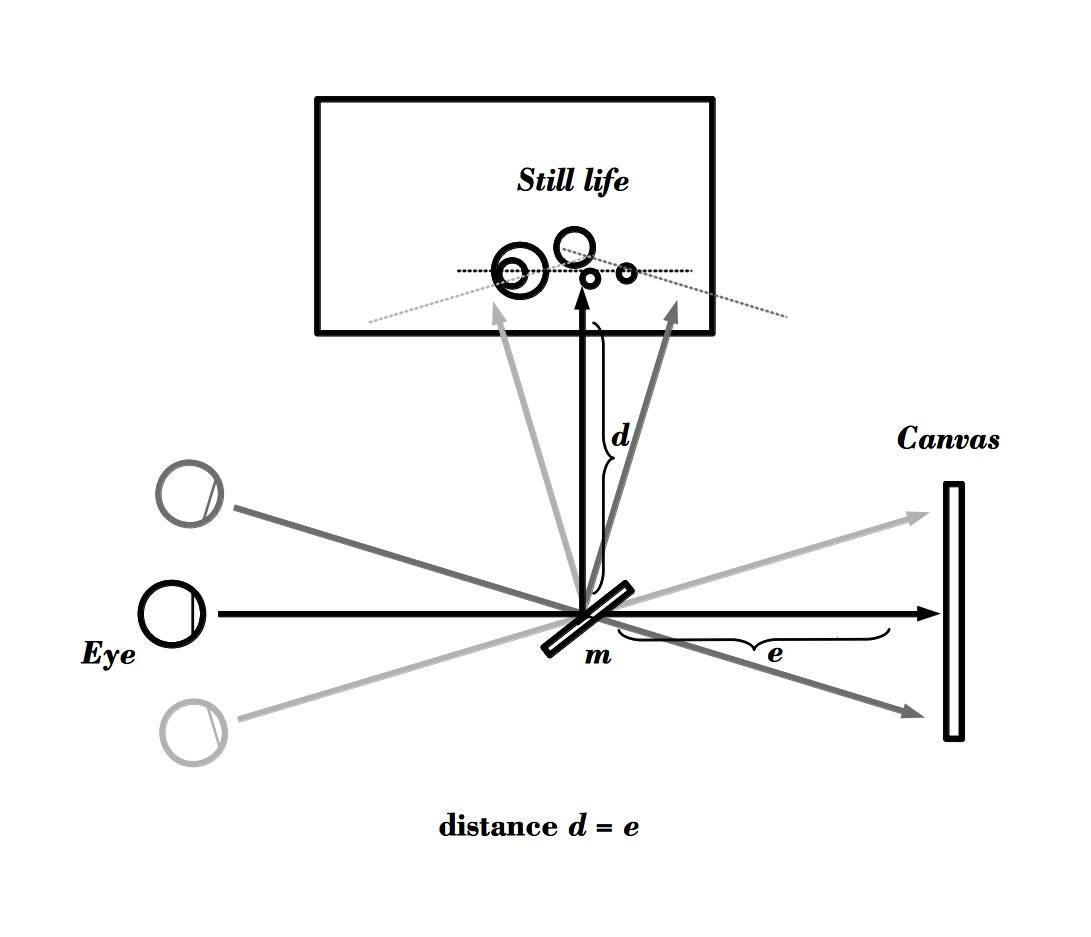
Aligning the mirror 45 degrees in the line of sight to the canvas (or in this case gesso primed panel) where the distance from the mirror (m) to the canvas (e) equals the distance from mirror to still life (d) – otherwise you will have problems with parallax effects.
Ok, the equipment is rigged! Its half past four in the afternoon, lets load up some paint and get started. Using stock pigments available back then in the 1650s: Cremnitz White, Madder, Golden Ochre and Black. Lapis Lazuli (or Natural Ultramarine Blue) was I believe considered far too expensive to experiment with. This color setup is the anachronistically named “Zorn palette” used since the beginnings of painting and its overall orange domination makes white/black mixes appear blue. Using Madder instead of Vermillion in this case as I only need the cold reds here. Actually Jan Vermeer used a lot of Lapis Lazuli, more than any of his contemporaries – something to look into some other time.

Squinting in the mirror, trying to shift my head sideways and up and down – tracing the contours of the background in black. Later moving on to the Oil-flask and walnuts…
I have chosen to make a Optically Aided version of a still life already on the shelf – of course this one will be mirrored in comparison with the one i made this spring.
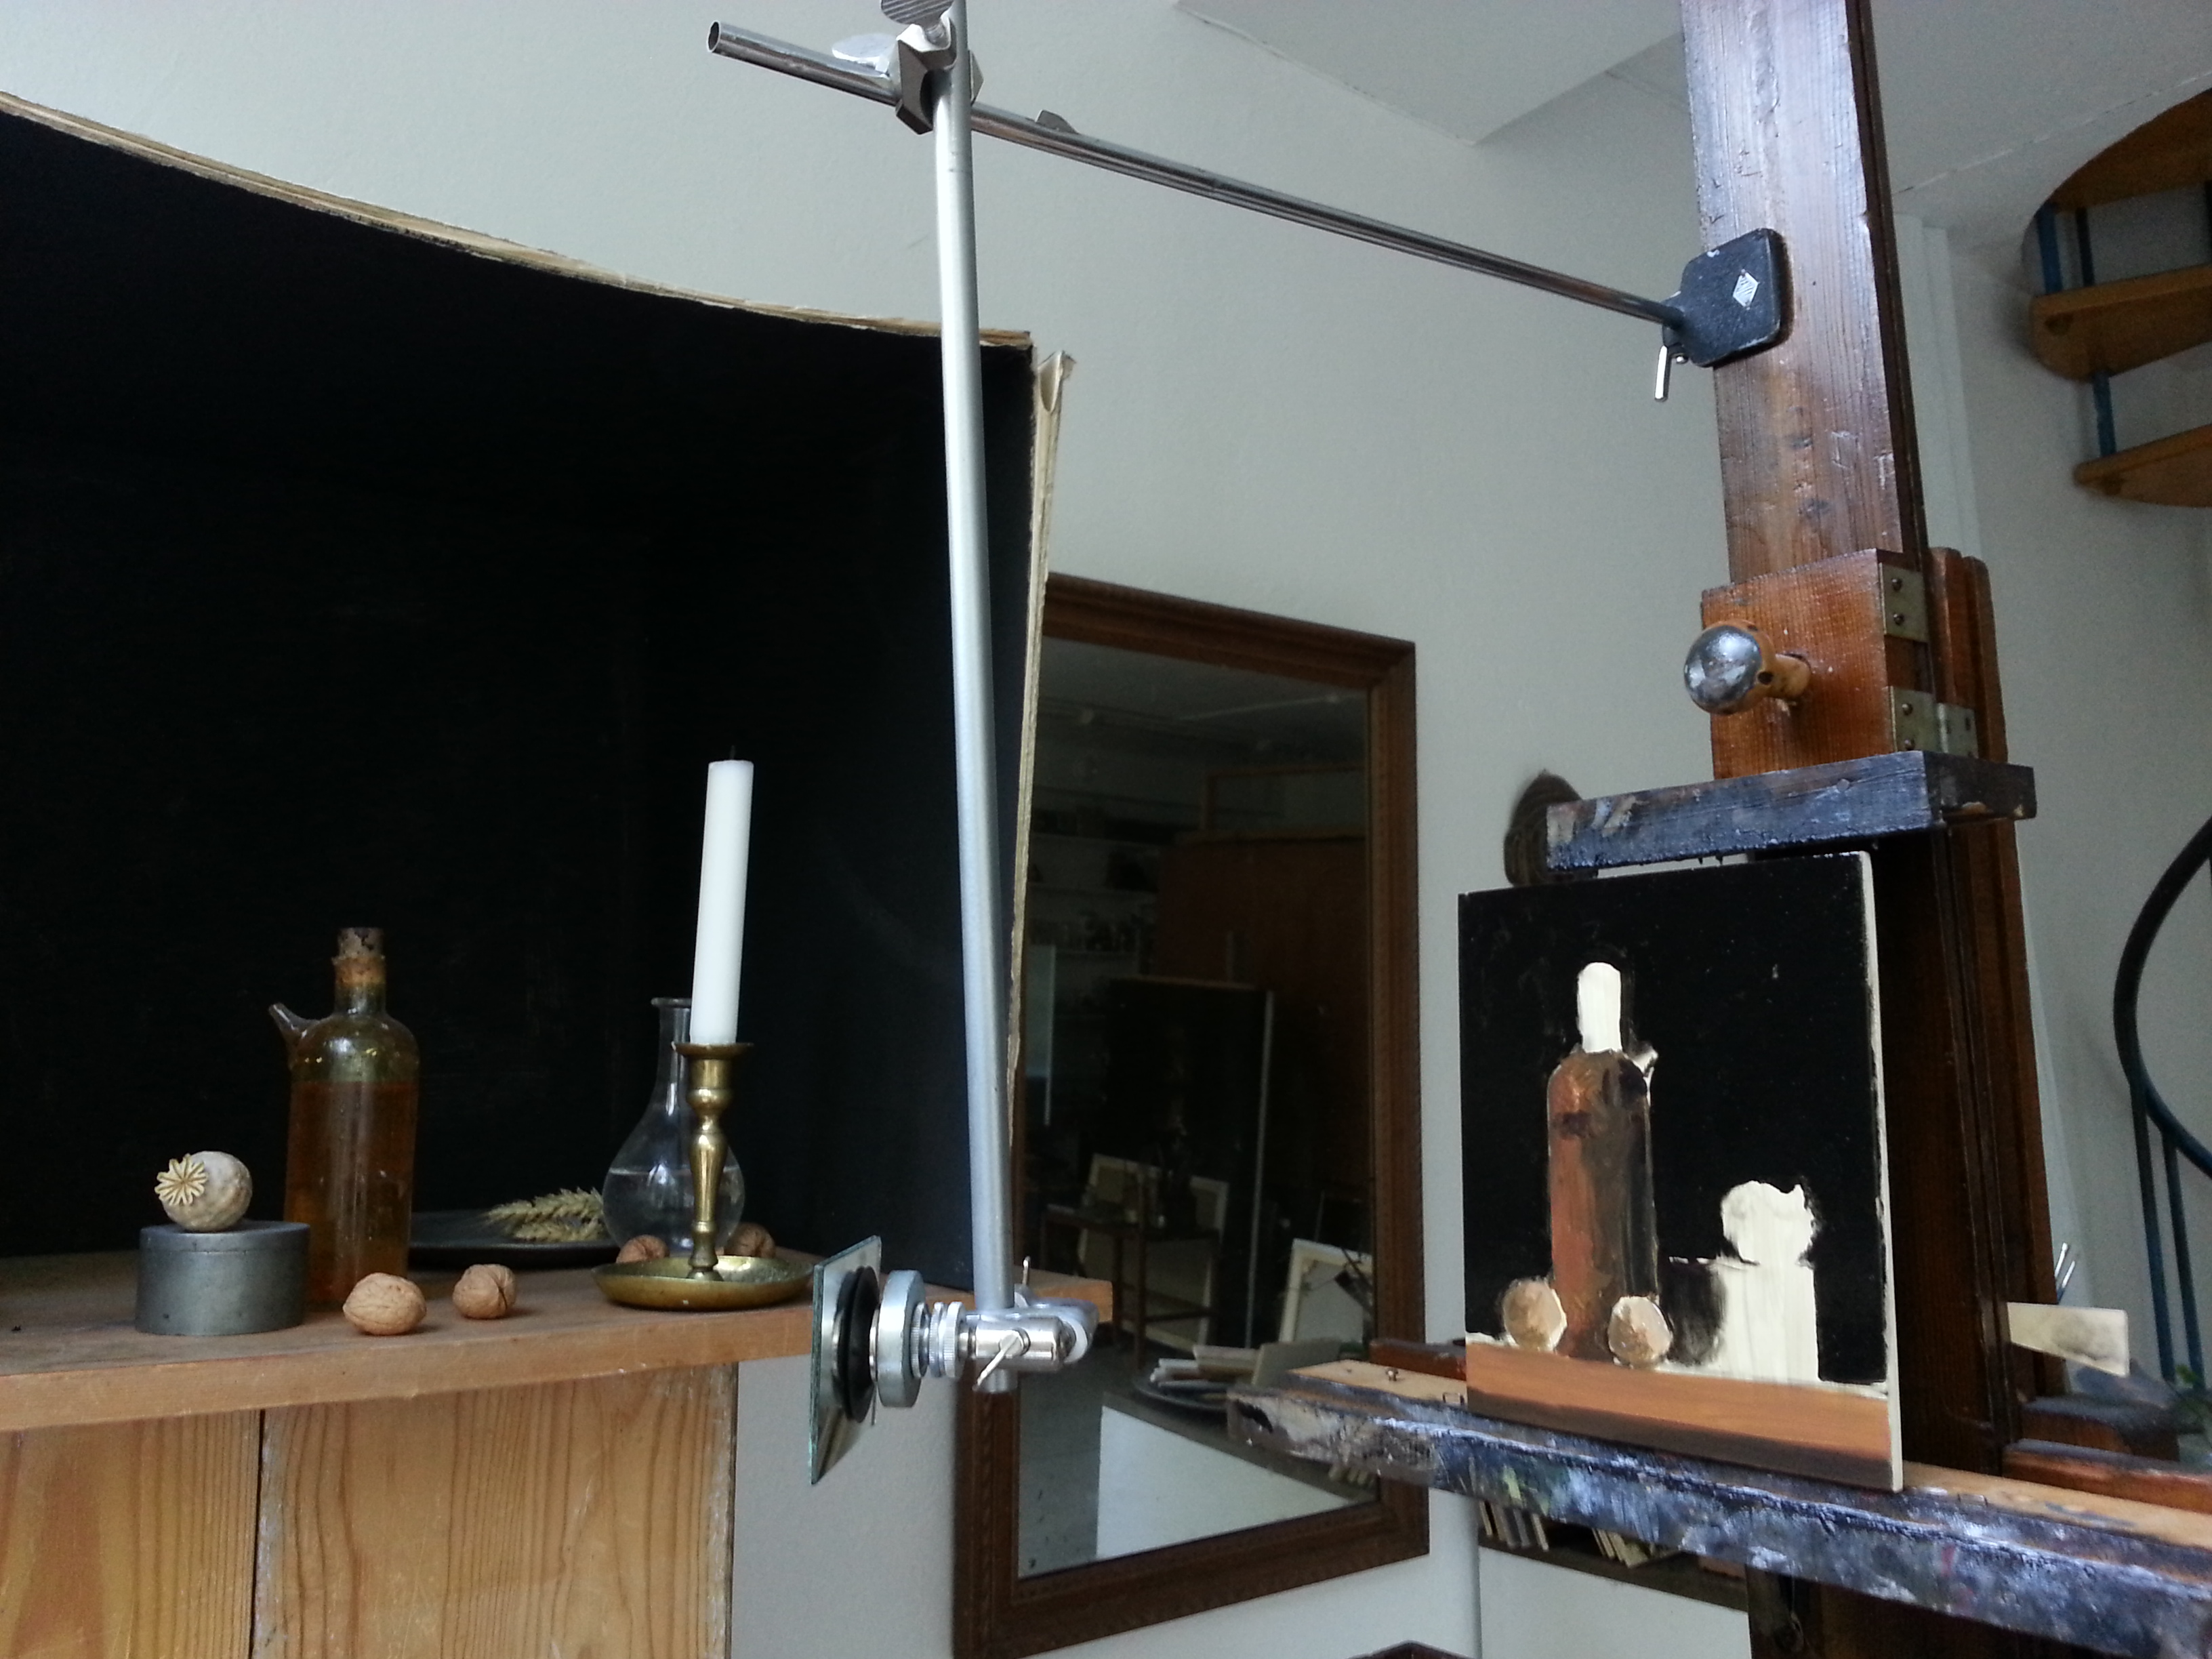
After a while one gets used to the technique – I found it was comparable to the “Sight Size” drawing method: you tend to flip your eye back and forth this time along the edge of the mirror. Now I’ll move on to the jar and the highlights…
My setup is far from optimal: the mirror is a bit too thick, the edge where the glass is ground is disturbingly bright and the metal rod holding it should be thinner and black to minimize visual disturbances. Its hard to avoid bumping in to the mirror when moving in this cramped area. With the Lens and Concave Mirror arrangement shown later in the movie I suppose that issue can be worked out. The shelf in the painting is a bit tilted due to the mirror not being adjusted properly.
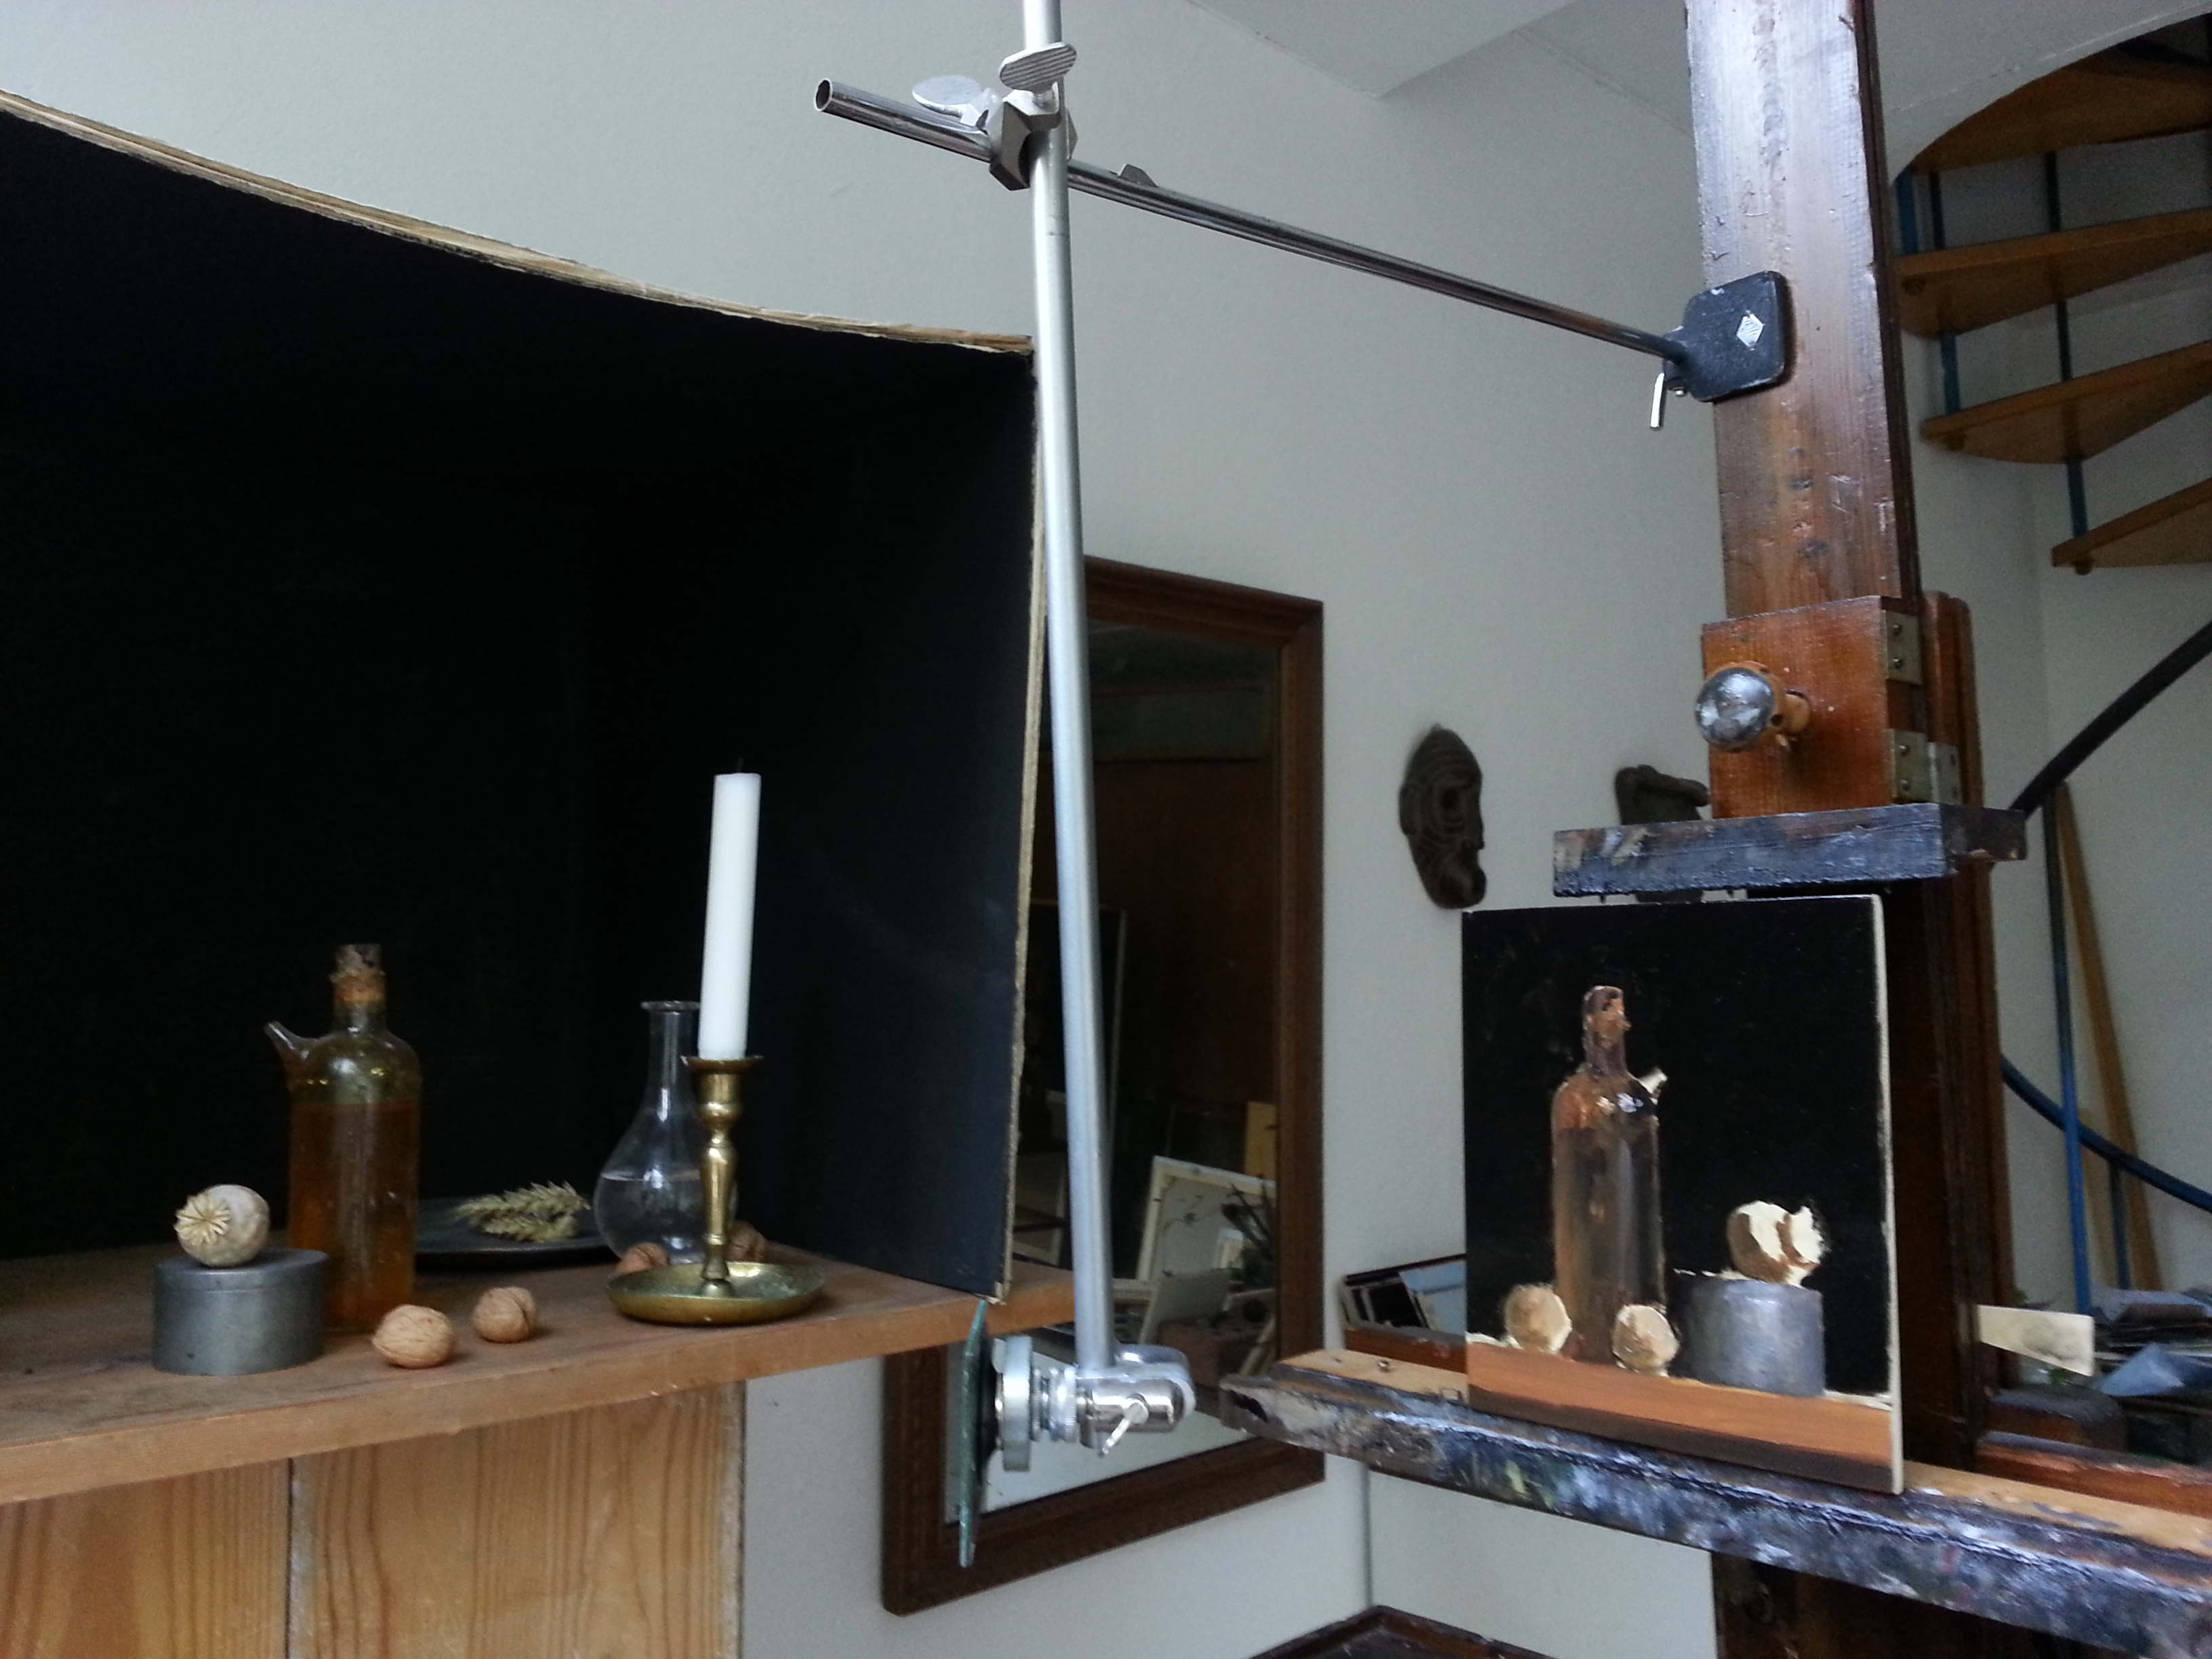
It’s getting darker now and I must finish this stage in the painting, that means smoothening some edges, enhance and correct others… Thanks to using sun thickened linseed oil, lead white and golden ochre the painting will dry enough for oiling in and continued work in two days, or if the weather remains nice and bright, already tomorrow.
Most smartphone cameras tend to overexpose so you can’t sense the late summer scandinavian evening coming on in the photos. The painting is now ready to dry so another layer of more detail can be applied. My conclusion so far?
The method works, if you keep the objects mostly in one plane this technique certainly could help in getting both the Drawing, Tone and Color right. Hm, one plane – makes you think of someone right? That guy who fled Rome facing murder charges and abandoned a bunch of mirrors in a rented room with a hole torn out in the roof.
And what about this smiling seahorse? -You will have to see the movie to figure that one out 😉